Posts

Showing posts from July, 2014

SqlDataSource Control Part 5: Write Custom SELECT Statement To Display Category, And Supplier Name

Image
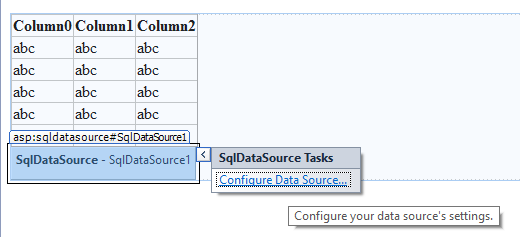
Instead of select the columns on your GridView using the GridView's "Edit Columns" wizard, you can use a custom SELECT statement that you write to display the appropriate columns.  In this blog we will write our own custom SELECT statement to display the category name, and supplier company on our GridView control. To specify a custom SELECT statement perform the following steps: 1.  Click on the ">" icon on the SqlDataSource1 control, then click on the "Configure Data Source" 2.  Click the "Next" button until you reach the "Configure the Select Statement" screen, select the "Specify a custom SQL statement or stored procedure" radio button.  Then click the "Next" button 3. On the "Define Custom Statements or Stored Procedures" screen select the "SELECT" tab, and then type in the following SELECT statement to get the CategoryName field in the Categories table, and the CompanyName field in the

SQL Server 2014 : Creating a Sysadmin Using a Windows 8.1 Account

Image
The one of thing that Windows 8 forces you to do is to sign in with an e-mail account.  I am not here to debate if it's a good thing or a bad thing.  But I just wanted to say, Microsoft why do you make our lives so complicated.  I just wanted Windows 7 with a touchscreen.  I digress :(   Anyways, if you install SQL Server on Windows 8 there is a little quirk that you have to deal with.  When you search for an account to add to your dba user login, you have to search on the entire username including the stuff after the @ sign.  Once again, I digress :( Anyways here is how you add a dba to SQL Server 2014 on a Windows 8 machine. 1.  Connect to your instance of SQL Server, then expand the "Logins" node 2. Right click on "Logins" node, and then select "New Login" 3. Click on the "Search" button 4. Type in the account you want to add in the "Enter the object name to select" text box.  That is my e-mail, feel free to e-mail me.  The only

The DELETE statement conflicted with the REFERENCE constraint "FK_Order_Details_Products". The conflict occurred in database "Northwind", table "dbo.Order Details", column 'ProductID'.

Image
The DELETE statement conflicted with the REFERENCE constraint "FK_Order_Details_Products". The conflict occurred in database "Northwind", table "dbo.Order Details", column 'ProductID'. The statement has been terminated. Description: An unhandled exception occurred during the execution of the current web request. Please review the stack trace for more information about the error and where it originated in the code. Exception Details: System.Data.SqlClient.SqlException: The DELETE statement conflicted with the REFERENCE constraint "FK_Order_Details_Products". The conflict occurred in database "Northwind", table "dbo.Order Details", column 'ProductID'. The statement has been terminated. Source Error: An unhandled exception was generated during the execution of the current web request. Information regarding the origin and location of the exception can be identified using the exception stack trace below. Stack T

GridView : Enable Pagination, Sorting, Selection

Image
You will notice that when you first create the GridView control all the records are displayed in one page.  You have to scroll just to see all the records.  This can be overwhelming for your users if there are a lot of records.  Also you can not sort or select each record on the GridVidew.  In this tutorial we will enable "Paging", "Sorting", and "Selection" on the GridView 1.  Click on the ">" icon on the GridView 2.  The "GridView Tasks" panel will be displayed 3.  Check the "Enable Paging", "Enable Sorting", and "Enable Selection" checkboxes 4.  Type Ctrl + F5  to run the application to see the changes

SqlDataSource Control Part 3: Enable Pagination, Sorting, Selection

Image
You will notice that when you first create the GridView control all the records are displayed in one page.  You have to scroll just to see all the records.  This can be overwhelming for your users if there are a lot of records.  Also you can not sort or select each record on the GridVidew.  In this tutorial we will enable "Paging", "Sorting", and "Selection" on the GridView 1.  Click on the ">" icon on the GridView 2.  The "GridView Tasks" panel will be displayed 3.  Check the "Enable Paging", "Enable Sorting", and "Enable Selection" checkboxes 4.  Type Ctrl + F5  to run the application to see the changes

GridView : Display Less Columns With "Edit Columns"

Image
Usually when you use the Query Builder feature to build your query you leave the "*" in the select statement.  Th problem with the "*" select statement is that it selects all the columns in the table.  This can sometimes make your GridView very big with all the columns in the table being displayed. In this tutorial we will display only the columns that we want our users to see.  This tutorial assumes that you've created a GridView with the "*" selected on the "Northwind", "Products" table. 1.  Click on the ">" icon on the right hand side of the GridView control, the "GridView Tasks" panel will appear 2.  Click on the "Edit Columns" link 3.  Select the "SupplierID" field in the "Selected fields" list box then click on the "X" button 4.  Select the "CategoryID" field in the "Selected fields" list box then click on the "X" button 5.  Select the

SqlDataSource Control Part 2: Display Less Columns

Image
Usually when you use the Query Builder feature to build your query you leave the "*" in the select statement.  Th problem with the "*" select statement is that it selects all the columns in the table.  This can sometimes make your GridView very big with all the columns in the table being displayed. In this tutorial we will display only the columns that we want our users to see.  This tutorial assumes that you've created a GridView with the "*" selected on the "Northwind", "Products" table. 1.  Click on the ">" icon on the right hand side of the GridView control, the "GridView Tasks" panel will appear 2.  Click on the "Edit Columns" link 3.  Select the "SupplierID" field in the "Selected fields" list box then click on the "X" button 4.  Select the "CategoryID" field in the "Selected fields" list box then click on the "X" button 5.  Select the

RadioButtonList : Bind RadioButtonList To A List Of Objects

Image
The RadioButtonList displays a collection of radio buttons on a web page. There can only be one selection in a group of choices at a time. In this tutorial we will create a RadioButtonList and then bind it to the Categories table of the Northwind database using a DataTable. To create a RadioButtonList control do the following: 1.  Select the "RadioButtonList" control under the "Standard" control in the "Toolbox" pane on the left. 2.  Drag the RadioButtonList control to a design surface 3.  In the source code of the .aspx page make sure "AutoPostBack" is set to true, the source code should look like this <asp:RadioButtonList ID="RadioButtonList1" runat="server" AutoPostBack="true"> </asp:RadioButtonList> 4. Create a connection string in the Web.Config file <connectionStrings> <add name="NorthwindConnectionString" connectionString="Data Source=(local); Initial Catalog=Northw

SqlDataSource Control Part 1: Bind The SqlDataSource To A GridView Without Writing A Single Line Of Code

Image
The SqlDataSource control is a data source control that is wizard driven to give you a quick and easy way to connect to the database.  It is a great tool to use if you need something quick to show your boss or if you need to set up a quick demo as a proof of concept.  Most .NET beginners like to use this data source control because it requires very little coding if any at all.  However, if you want to build a real world application you might want to think about creating a data access layer and a business layer to communicate with the database.  Imagine if your application gets bigger and each of your GridView uses an SqlDataSource control.  Each SqlDataSource has it's own query to maintain.  It would be a maintenance nightmare. The following is a step by step instruction of how to bind a SqlDataSource control to a GridView: 1.  Create a new project Web project in Visual Studio 2.  Create a new .aspx page 3.  Drag the "GridView" control from the "Toolbox" pane in