GIMP: Resize A Large Photo
Resizing images is a common task that you have to do to show your photo image on a website. Most digital camera or smart phones takes photos that are a lot larger than what most web sites can display in it's original size. In this blog we will show you how to resize your photo in GIMP.
Step By Step Instructions:
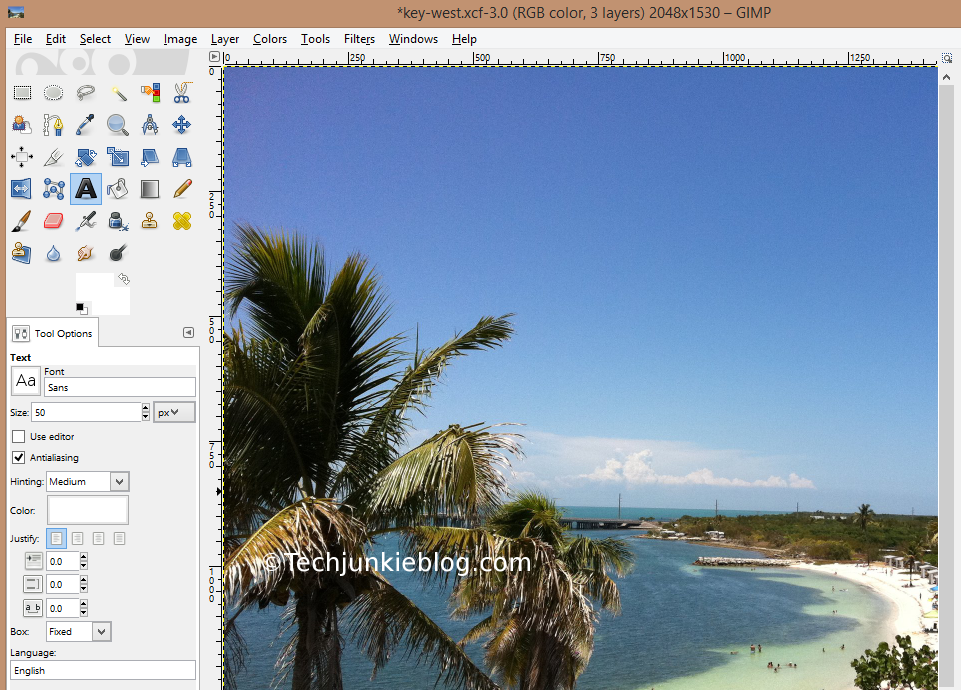
1. Open the original photo in GIMP
As you can see the photo has the dimension of 2048x1530, not suitable for web display
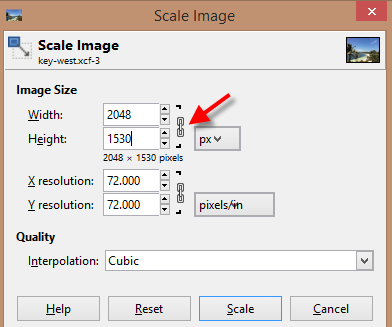
2. Click Image → Scale Image
3. The "Scale Image" dialog box will be displayed. The link icon
4. Type in the new width and height for the image, for this image I am going to type in 600 for the width, the height field will be adjusted automatically to be proportionate with the new width. Note you have to click on the height field for the height to be adjusted. This might be a bug. Click on the "Scale" button, and the image will be resized.
As you can see from the top status bar the image now has the dimension of 600x448
5. Now that we have the resized image we can export our image as a .jpeg file
6. To export the image click File → Export As, once the "Export Image" dialog is displayed, expand the "Select File_Type (By Extension)
7. Select "JPEG image" File Type
8. In the "Name" field give your resized photo a name.
9. Click the "Export" button
10. Accept the default export settings, and then click "Export" again
And here is the resized photo, suitable for the web.


Comments
Post a Comment