Posts

Showing posts with the label C#

ASP.NET Core : Create Our First Controller and View

Image
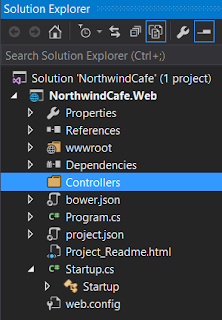
In the previous post we have enabled MVC on our application.  Now we want to add our first MVC controller and view to test out verify that MVC is working.  We also have to tell ASP.NET Core what pattern to look for when looking for our controllers and views. Step-By-Step Instructions: 1.  Add a folder call "Controllers" in the root of your application 2. Right click on the "Controllers" folder and select "Add" → "New Item" → .NET Core → MVC Contoller Class, then click "Add" 3.  You see the "HomeController.cs" class being added to the "Controllers" folder 4.  Double click on the "HomeController.cs" file and you will see the following code using System; using System.Collections.Generic; using System.Linq; using System.Threading.Tasks; using Microsoft.AspNetCore.Mvc; namespace NorthwindCafe.Web.Controllers { public class HomeController : Controller { // GET: / / public IActionResult Ind...

Bind Enum Type to A DropDownList Control In ASP.NET C#

Image
Suppose you have an enum type like the one below, and you want to bind the enum type to a DropDownList control in a Web Forms application.  How would you do this?  There's an easy way to do this with just a few lines of code.  You'll be amaze at how simple it is. First of all here is our markup code in our .aspx page <%@ Page Language="C#" AutoEventWireup="true" CodeBehind="Default.aspx.cs" Inherits="Sandbox.Default" %> <!DOCTYPE html> <html xmlns="http://www.w3.org/1999/xhtml"> <head runat="server"> <title></title> </head> <body> <form id="form1" runat="server"> <div> <asp:DropDownList ID="DropDownList1" runat="server"></asp:DropDownList> </div> </form> </body> </html> Now let's define our enum type, the last value is 400 just to confirm that the Dr...

C#: System.Collections.Generic.Dictionary

Namespace: System.Collections.Generic Declaration: Dictionary<string, string> account = new Dictionary<string, string>(); Adding Items: account.Add("id","1"); account.Add("username", "jackd"); Use in ArrayList: Namespace: System.Collections Add Dictionary to ArrayList: Dictionary<string, string> account = new Dictionary<string, string>(); ArrayList aList = new ArrayList(); account.Add("id","1"); account.Add("username", "jackd"); aList.Add(account); account = new Dictionary<string, string>(); account.Add("id","2"); account.Add("username", "janed"); aList.Add(account); account = new Dictionary<string, string>(); account.Add("id","3"); account.Add("username", "d"); Loop Through ArrayList of Dictionary Type: foreach (Dictionary<string, string> dic in aList) { Response.Write("id: ...

ASP.NET MVC 5 From Scratch : Create Entity Data Model With Entity Framework

Image
In our previous blogs we've created an ASP.NET MVC from scratch.  In this blog we are going to use Entity Framework as the ORM (Object Relational Mapping) as a conduit to our database, so that we can query our data as an object.  An ORM as the name implies maps database tables, views, and stored procedures as objects in a programming language so that developers can work with the data as objects. Step-by-Step Instructions: 1.  First we need to add the Entity Framework 6.1.3 to our ASP.NET MVC, we accomplish by right-click on "References" then select "Manage NuGet Packages" 2. On the search box type in "EntityFramework" no spaces, in the search result click on the "Install" button next to the "EntityFramework" package. 3.  Click "I Accept" on the "Licence Acceptance" screen 4. Click "Close" 5.  Once the "EntityFramework" package has been added you will see a green checkmark next to the "E...

C# : Automatically Implemented Properties

There are times when you see a class property without it's private member counterpart and all you see is the {set; get;} accessors. What you are looking at are auto properties that you can create  in C#, the only requirements is that the set; and get; accessors contains no logic.  Usually there are private members that the properties expose to other classes using the get/set accessors, like the code below: public class Product { private int productId; private string name; private string description; private decimal price; public int ProductId { get { return productId; } set { productId = value; } } public string Name { get { return name; } set { name = value; } } public string Description { get { retur...

log4net : Install log4net on ASP.NET Part 1

Image
log4net is the most commonly used ASP.NET logging package.  It is robust and flexible in it's features.  You can choose to log your errors on the database or in a log file or multiple log files.  However, it is not as straight forward to set up.  In this blog we will go through the steps to install log4net using NuGet Package Manager. 1.  Create an empty web project, and call it whatever you like, below is the settings that I have, then click "OK" 2. Right click on the solution and select "Manage NuGet Packages for Solution..." 3.  Locate the search box on the left hand side 4. Type "log4net" in the search box, the latest log4net version will show up in the search results in the main window.  Click on the "Install" button. 5.  Select the project that you want log4net to be installed, then click "OK" 6.  After the installation under "References" log4net will be added 7.  

Entity Framework (Database First) Part 4: Using the LINQ and Projection To SELECT Columns From Entities

Image
In the last blog we just selected the Products entities from the NorthwindEntities with this Linq Query. var query = from prod in nwctx.Products select prod; It gets the job done but, the GridView displays the CategoryID and SupplierID as integers, which is not very useful to your users. Plus, we don't want to display the ProductID. In this blog we are going to refine the LINQ query so that the GridView only display the columns that we want to display with Projection and Anonymous Types.  Projection is to transform an object into a new form with only the properties that you want in the new form.  In our case we want to transform the Products DataSet to a new form that only returns the data that we want. The resulting GridView after projection is looks like this. Notice that the ID column is hidden and the Category and Supplier shows the actual Category name and the Supplier name. Here are the steps: 1.  Open up the project that you've completed on the last blog....

C# : Arrays

Arrays are fixed size elements of a type, arrays are stored next to each other in the memory. Making them very fast and efficient.  However you must know the exact size of an array when you declare an array. Declaring an array: string[] names = new string[5]; There are two ways you can assign values to an array. The first is to assign the values individually by specify the index of the array inside a square bracket. The index is the position of element in the array. Index starts with 0. names[0] = "George"; names[1] = "James"; names[2] = "Arthur"; names[3] = "Eric"; names[4] = "Jennifer"; Or you can initialize and populate the array at the same time, like the example below. string[] names = new string[]{"George","James","Arthur","Eric","Jennifer"}; You don't have to specify the size of the array if you initialize during the declaration, C# is smart enough to figure out the array siz...

Entity Framework (Database First) Part 3: Using the Entity Framework Objects In ASP.NET Project

Image
This is part three of our series on Entity Framework. In the last blog we went over how to create an Entity Framework model with the Northwind database. Now we are going to use that model in our ASP.NET by binding the Entity objects that have created to a GridView in our "Northwind" ASP.NET project. Usually we would put the Entity Framework model in a class library project and use it as our data access layer, but for simplicity I've decided to put in the same project as the ASP.NET pages. Below are the directions on how to use the Entity objects in our web pages. 1. Create "Default.aspx" page in the "Northwind" web project. 2. Add a GridView control to the page. 3. In the "Default.aspx.cs" file add the following using statement using Northwind.Models; Northwind.Models is the namespace of models that we just created. 4. Then in the Page_Load method write the following code. protected void Page_Load(object sender, EventArgs e) ...

RadioButtonList : Bind RadioButtonList To A List Of Objects

Image
The RadioButtonList displays a collection of radio buttons on a web page. There can only be one selection in a group of choices at a time. In this tutorial we will create a RadioButtonList and then bind it to the Categories table of the Northwind database using a DataTable. To create a RadioButtonList control do the following: 1.  Select the "RadioButtonList" control under the "Standard" control in the "Toolbox" pane on the left. 2.  Drag the RadioButtonList control to a design surface 3.  In the source code of the .aspx page make sure "AutoPostBack" is set to true, the source code should look like this <asp:RadioButtonList ID="RadioButtonList1" runat="server" AutoPostBack="true"> </asp:RadioButtonList> 4. Create a connection string in the Web.Config file <connectionStrings> <add name="NorthwindConnectionString" connectionString="Data Source=(local); Initial Catalog=Northw...

DropDownList Part 4: Bind DropDownList To A List Of Objects

Image
In this part of the tutorial we will bind a DropDownList control to a list of objects.  This common practice if you are working with business objects that are mapped to the database table.  We will create a business object call "Category" and create a list call "categories" in our .aspx page. One of the most commonly used server controls in ASP.NET is the DropDownList control.  In this blog I will show you how to bind a list of objects to a DropDownList control. 1. Create a .aspx page 2. Click on the "Toolbox" panel 3.  Drag the DropDownList control into a design surface 4. Create a connection string in the Web.Config file <connectionStrings> <add name="NorthwindConnectionString" connectionString="Data Source=(local); Initial Catalog=Northwind;Integrated Security=True" providerName="System.Data.SqlClient"/> </connectionStrings> 5. Create a new folder in your project call "BusinessObjects" th...

RadioButtonList : Bind RadioButtonList Control To A DataTable

Image
The RadioButtonList displays a collection of radio buttons on a web page. There can only be one selection in a group of choices at a time. In this tutorial we will create a RadioButtonList and then bind it to the Categories table of the Northwind database using a DataTable. To create a RadioButtonList control do the following: 1.  Select the "RadioButtonList" control under the "Standard" control in the "Toolbox" pane on the left. 2.  Drag the RadioButtonList control to a design surface 3.  In the source code of the .aspx page make sure "AutoPostBack" is set to true, the source code should look like this <asp:RadioButtonList ID="RadioButtonList1" runat="server" AutoPostBack="true"> </asp:RadioButtonList> 4. Create a connection string in the Web.Config file <connectionStrings> <add name="NorthwindConnectionString" connectionString="Data Source=(local); Initial Catalog=Northw...

DropDownList Part 3: Use The DropDownList Control To Populate GridView

Image
If you work on the DropDownList control, eventually you will be asked to populate some sort of data grid based on the selection on the list. The most common control you have to populate is the GridView control. This tutorial builds from part 1 and part 2 about DropDownList control. So make sure you go through those blogs before you start this one. In this tutorial we will learn how to populate the GridView via a DropDownList selection. 1. Select the "GridView" control from the "Toolbox" pane on the left 2. Drag the GridView control to a design surface 3. Enable the "AutoPostBack" attribute on the "DropDownList1" control, by clicking on the "Source" tab then add the following line <asp:DropDownList ID="DropDownList1" runat="server" AutoPostBack="true"> </asp:DropDownList&gt 4. In the code behind add the BindGridView method protected void BindGridView(int catId) { DataTable dtProduc...