Posts

Showing posts with the label Visual Studio

Create .gitignore for Visual Studio

Image
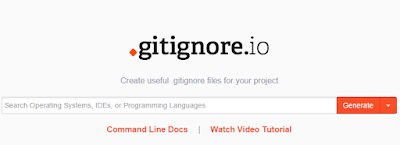
One of the first thing you have to do when you are creating a git repository is to create a .gitignore file that tells git to ignore the files specified in the .gitignore file.  Since Visual Studio produces all kinds of files it could take a while if you tried to create a .gitignore file from scratch.  Well there's a website that will generate a .gitignore file for you.  It's called gitignore.io   all you have to do is type in the IDE in this case it's VisualStudio without any spaces and the website will generate a .gitignore file for you automatically. Step-By-Step Instructions : Type in the URL https://www.gitignore.io   2. In the text box, type in "VisualStudio" without the double quotes 3.  Then click on the "Generate" button 4.  That's it, a .gitignore file is generated for you, save the file and put it at the root of your Visual Studio repository and you will ensure that the only thing that will get committed are the source codes Note:  You ...

Entity Framework Part 1: Installing Entity Framework 6.1.1 With NuGet

Image
In this blog I will show how to install Entity Framework 6.1.1 with NuGet in Visual Studio 2013 1.  Create a project call "Northwind" 2.  Right click on the solution that the project resides in, then select "Manage NuGet Packages for Solution...." 3.  The "Manage NuGet Packages" window is displayed 4.  In left hand side select "Online", and then select "nuget.org" 5.  In the "Search Online" textbox type in the word "EntityFramework", this will search for the latest version of EntityFramework available 6.  Click on the "Install" button 7.  Select the project you want install EntityFramework to be installed in, then click on "OK" 8. Click "OK" to accept the terms and conditions 9.  When the Entity Framework is installed you will see a check mark next to package 10.  Now you will see the the project has references to the Entity Framework DLLs Blogs in the Entity Framework Series: Installing...

Add a Data Connection To A SQL Server Database In Visual Studio 2013

Image
The "Server Explorer" tool in Visual Studio 2013 is a good tool at your disposal if want to interact with the database in GUI environment.  To create a new data connection to the database in the "Server Explorer" perform the following actions: Click on "Server Explorer" tab in the left hand side, then click on "Add Connection" 2.  In the "Data source" list box, select "Microsoft SQL Server", for data provider select ".NET Framework Data Provider for SQL Server", then click "Continue" 3. In the "Server name" field type in the hostname\database instance  of the database you want to connect to.  Under "Connect to a database", there is a text box or a drop down list.  You can type in the name of the database if you know it.  Or let Visual Studio pick up the database for you so that you can select it from a list of available databases in the SQL Server instance you've selected.  If you se...

Create A Blank Solution in Visual Studio 2013

Image
When you are starting a new project, you might not want to use the templates that Microsoft provided for you. There are times when you want to start off the project with a clean slate.  You can create a blank solution in Visual Studio.  However, the option to create a blank solution is kind of hidden. Follow the steps below to create a blank solution: Open Visual Studio 2013, and then click on "File", then select "New", then  "Project" 2.  Expand the "Other Project Types" node on the left hand navigation, then select "Visual Studio Solutions". Then select the "Blank Solution" template on the right hand side. 3.  Give your solution a name and then click "OK" 4.  Your blank solution will be displayed in "Solution Explorer"