Posts

Showing posts with the label Javascript

ASP.NET Core : Add jQuery, Bootstrap, AngularJS Using bower.json

Image
In this blog post we are going to add the jQuery, AngularJS, and bootstrap libraries to our ASP.NET Core application.  Normally we will use NuGet to bring in these libraries but ASP.NET Core gives you the option to use bower to configure the dependencies that you will need on the client-side. Here are the steps to import the client-side dependencies into our project: 1. First let's make bower.json part of the "NorthwindCafe.Web" project, by right click on the bower.json file, and then choose "Show in Solution Explorer" 2.  Open the bower.json file the markup should look like this { "name": "asp.net", "private": true, "dependencies": { } } 3. Change the markup to look like the following { "name": "asp.net", "private": true, "dependencies": { "bootstrap": "~3.3.6", "angular": "~1.5.7" } } 4. Save the bower.js...
How To Create An ASP.NET Core Application From Scratch

Image
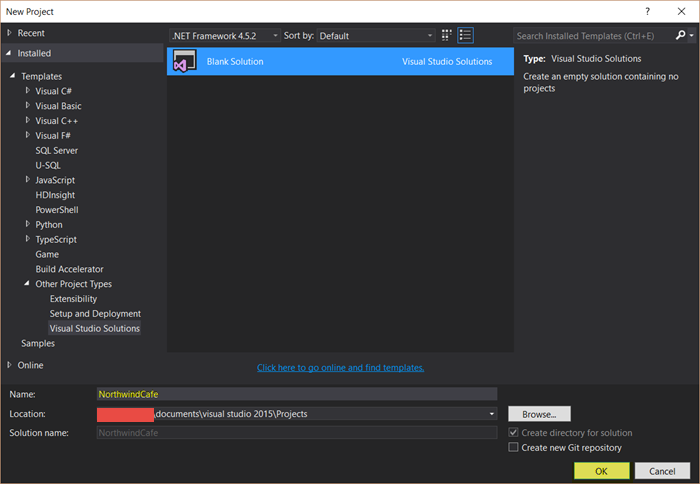
Technology has moved at a breakneck speed, after working with ASP.NET Core for a while, I realized that my ASP.NET MVC blog articles have become outdated.  Don't get me wrong, MVC is still a very big part of ASP.NET Core, but that's the thing it's just a part of it.  ASP.NET Core has decoupled the infrastructure from the application.  You can deploy your web app on Docker imagine that!  No longer is IIS your primary means of hosting your ASP.NET application. However, with this new freedom comes added complexity.  No longer can you just drag and drop components into your design surface.  Those days are long gone.  This post ist meant to ease your way into ASP.NET Core.  I will using the release candidate version two of ASP.NET Core for this post and other subsequent posts.  Don't be surprise if I update the version midstream because the product is still pre-release.  I will be using Visual Studio 2015 for my development.  You can use...

AngularJS SPA Pt 3 : Refactor Code to Not Use Global Variables (Shopping List App)

Image
In the previous blog we got Angular-Seed to work with a module and a controller.  However, we put everything in the global scope.  The problem with that is that there are many JavaScript libraries that might be using the same variables as we are, or if we are working with other developers.  The way we can mitigate this problem is to wrap our modules and controllers in an anonymous function.  Think of an anonymous function as a wrapper or a container to hold our modules and controllers.  Another term developers like to refer to anonymous function is an IIFE.  Whatever it's called it's always good practice to avoid putting things in the global environment if it can be avoided. Here are the steps to take the modules and controllers out of the global environment: 1.  First let's wrap the module in an anonymous function.  The source code for the app.js file should look like the following (function(){ 'use strict'; var app = angular.module('sho...

AngularJS SPA Pt 2 : Preparing Angular-Seed For The Shopping List Application

Image
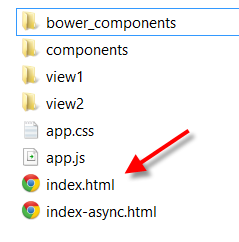
The previous blog we setup the Angular-Seed boilerplate template for our SPA application.  In this blog we are going to prepare the Angular-Seed template for our SPA application which is going to be a simple shopping list application.  The steps below describes the steps to clean up some of the pages in the angular-seed template for our application. 1.  Delete the content of the "index.html" page in the angular-seed main folder.   It is located in the main folder of the angular-seed template "/angular-seed 2.  The source code file "index.html" should look like the following <!DOCTYPE html> <html lang="en"> <head> <meta charset="utf-8"> <title>Shopping List App</title> <link rel="stylesheet" type="text/css" href="app.css"> </head> <body> <script type="text/javascript" src="js/lib/angular.js"></script> <script type="t...

Use Bower to Get Client Dependencies

Image
Bower is a JavaScript tool to get client dependencies in your project using npm packages. The requirement for bower is that you need to install Node.js first.  You can follow along in the this  blog  to install node.js, After node.js is installed open the command line and type the following command npm install -g bower The command above will install bower in your system globally.  Now we can use bower install packages individually, but the convenience of bower is in the bower.json file.  With the bower.json file we can specify all the dependencies that our project will need in one configuration file. Here are the steps: 1.  Create a folder call "AngularShoppingApp" 2.  Create a file call bower.json in your favorite text editor 3.  The content of the bower.json file should look like this { "name": "ShoppingApp", "private": true, "dependencies": { "angularjs": "~1.5.7", "bootstrap": "~3.3....

Bootstrap: Setting Up Bootstrap Using The Bootstrap CDN

"Bootstrap is the most popular HTML, CSS, and JS Framework for developing responsive, mobile first projects on the web."  - getbootstrap.com Brief Introduction: Bootstrap is a front-end framework using HTML, CSS and JavaScript to build menus, navigations, layouts, forms, tables, and etc.  What is special about Bootstrap is that mobile-first, and responsive design is it's default behavior.  Okay, hold on, let me put my professor's glasses on! Okay class here goes: Mobile-First Design :  You design your site for mobile devices first so the desktop version is second class citizen. Responsive Design: A design that makes your site look good on all screen sizes, and does not need to degrade gracefully.  Meaning you can resize, stretch, maximize, do yoga with your site and it will still look good.  Well up to a certain threshold. So to setup Bootstrap, you will do the following: 1. Create an HTML5 page <!DOCTYPE html> <html lang="en"> <head...

ASP.NET MVC 5 From Scratch : Add KnockoutJs to Project With NuGet

Image
In this blog we will add the KnockoutJs JavaScript library to our MvcApp project.  KnockoutJs is a great lightweight data binding library.  Follow the steps below to add KnockoutJs to your ASP.NET MVC project. Step-By-Step Instructions : 1.  Right-click on the project's "References" node, then select "Manage NuGet Packages" 2. In right hand side type in "knockoutjs", then click on the "Install" button next to the knockoutjs package   3.  You should see a green checkmark after you finished adding the knockoutjs library to the MvcApp project. 4. In the "Scripts" folder you will see the knockout JavaScript files 5.  Now that we have the knockoutjs files we need to add the files to the BundleConfig.cs file to register them 6.  Open the BundleConfig.cs file in the "App_Start" folder type the following lines of code inside the RegisterBundles method, this tells MVC to include any files in the "Scripts" folder that sta...

ASP.NET MVC 5 From Scratch : Adding BundleConfig

Image
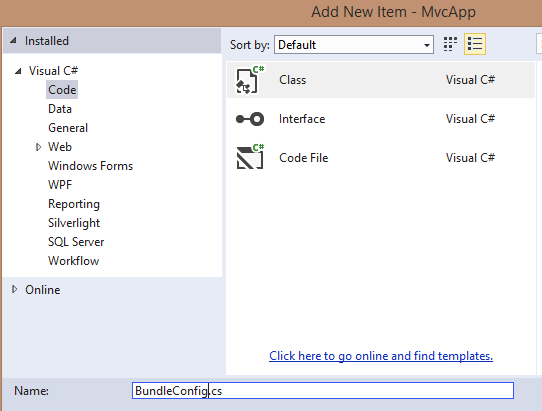
In our previous blog we've added a _ViewStart.cshtml layout to our project, which is the default layout for our pages if no layout is specified for the page.  In this blog we will add BundleConfig for the JavaScript libraries which includes JQuery , and Bootstrap that we've added to our MvcApp project in the previous blogs.  A configuration bundle allows you to group files that belongs in the same libraries together so that they can called with just one line of code.  In this blog we will be creating configuration bundles for JQuery, and Bootstrap to the MvcApp project. Step-By-Step Instructions : 1.  Right-click on the folder "App_Start", then select Add → New Item → Visual C# → Class, name the class BundleConfig.cs 2.  Now the App_Start folder should look like the screenshot below 3.  Open the BundleConfig.cs file, then delete the existing using statements, and then add the following namespaces using System.Web; using System.Web.Optimization; 4. The resu...

ASP.NET MVC 5 From Scratch : Add JQuery Library Using NuGet

Image
In the previous blog we've created an empty ASP.NET MVC 5 project.  It's a great starting point but, it's missing a lot things that we will need later.  In this blog we will add JQuery to the empty ASP.NET MVC 5 project that we've just created. Step-By-Step Instructions: 1. Open the empty ASP.NET MVC 5 project that you've just created 2.  Right click on the the "References" node in the "Solution Explorer", then select "Manage NuGet Packages" 3. In the search box on the right of NuGet window type "JQuery", the search result will be displayed 4. Click on the "Install" button next to the JQuery result, it should be at the top of the list 5. Once the JQuery library has been installed a green check mark is displayed, click on the "Close" button 6.  Now you should see the JQuery scripts in the "Scripts" folder 7.  To use the JQuery .js script reference the jquery-2.14.min.js file with the following code...

ASP.NET MVC 5 From Scratch : Add JQuery UI Library Using NuGet

Image
In the previous blog we've added the Bootstrap library to our empty ASP.NET MVC project.  Now let's add another commonly used JQuery library to our project.  In this blog we will add the JQuery UI library to our empty project. Step-By-Step Instructions: 1. Open the empty ASP.NET MVC 5 project that you've just created 2.  Right click on the the "References" node in the "Solution Explorer", then select "Manage NuGet Packages" 3.  In the search box on the right of NuGet window type "jquery ui combined", the search result will be displayed, the package that you want to install is highlighted below.  Notice it's the third choice which is called the jQuery UI (Combined Library) 4.  Click on the "Install" button next to the "jQuery UI (Combined Library)" package. 5.  Once the JQuery UI library has been installed a green check mark is displayed, click on the "Close" button 6.  Now you should see the JQuery UI...

ASP.NET MVC 5 From Scratch : Add Bootstrap Library Using NuGet

Image
In the previous blog we've created added the JQuery library to an empty ASP.NET MVC 5 project. In this blog we will add the Bootstrap to the empty ASP.NET MVC 5 project that we've just created. Step by Step Instructions: 1. Open the empty ASP.NET MVC 5 project that you've just created 2.  Right click on the the "References" node in the "Solution Explorer", then select "Manage NuGet Packages" 3.  In the search box on the right of NuGet window type "bootstrap", the search result will be displayed 4. Click on the "Install" button next to the "Bootstrap" result, it should be at the top of the list 5.  Once the Bootstrap library has been installed a green check mark is displayed, click on the "Close" button 6.  Now you should see the Bootstrap scripts in the "Scripts" folder 7.  You will also noticed that the "Contents" folder has been created, this folder was created when NuGet installed...

ASP.NET MVC 5 From Scratch : Configure The BundleConfig Class To Use CDN

Image
A lot of developers assumed that they can only configure the BundleConfig class to use only local resources in their MVC project.  That is not the case, in fact it is quite easy to use a cdn version of your JavaScript libraries instead of the one in your local folder.  In the previous blog  we went over how to create the BundleConfig class from scratch.  In this blog we will go over how to configure MVC to use the cdn resource instead of your local resource files. Step-By-Step Instructions: 1.  Open the MvcApp project 2.  Open the BundleConfig.cs file under the folder App_Start 3.  From the last blog we have the following code using System.Web; using System.Web.Optimization; namespace MvcApp { public class BundleConfig { public static void RegisterBundles(BundleCollection bundles) { bundles.Add(new ScriptBundle("~/bundles/jquery").Include("~/Scripts/jquery-{version}.js")); bundles.Add(new ScriptBundle("~/...

AngularJS SPA Pt 1 : Setting Up Angular-Seed

Image
angular-seed is an AngularJS application skeleton template.  An application skeleton let's gives you a boiler plate template so that you don't have to start the application from scratch.  You can get the source code from https://github.com/angular/angular-seed .  Below are the steps to use angular-seed ass your application template for AngularJS. Step-By-Step Instructions : 1.  Go the page  https://github.com/angular/angular-seed 2. Open Git GUI.  if you don't have Git install you can follow this blog . 3.  In the Github angular-seed page copy the "HTTPS clone URL" 4.  In Git GUI click on the link "Clone Existing Repository" 5.  In "Source Location" paste the angular-seed clone URL that you've just copied, then on the "Target Directory" field type in or browse to the folder that you want to store the repository in on your local machine.  Then click "Clone" 6.  Click on "Expore Working Copy" to see the repositor...