Posts

Showing posts with the label ASP.NET MVC

ASP.NET Core : Adding The Default View With _ViewStart.cshtml

Image
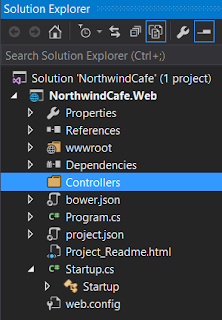
In ASP.NET MVC there is a default layout file that the application use when one exists.  If you look at the markup at the top of the "Index.cshtml" file you will see that there is a markup to specify the layout of the page in the code below. @{ Layout = null; } The code above tells ASP.NET MVC to not assign any layout to the page because it is being set to null. In this blog we will build on our existing NorthwindCafe.Web    project and add a default layout view to the project so that each page in the project will have a common layout.  This is similar what you would a master page for in web forms.

ASP.NET Core : Create Our First Controller and View

Image
In the previous post we have enabled MVC on our application.  Now we want to add our first MVC controller and view to test out verify that MVC is working.  We also have to tell ASP.NET Core what pattern to look for when looking for our controllers and views. Step-By-Step Instructions: 1.  Add a folder call "Controllers" in the root of your application 2. Right click on the "Controllers" folder and select "Add" → "New Item" → .NET Core → MVC Contoller Class, then click "Add" 3.  You see the "HomeController.cs" class being added to the "Controllers" folder 4.  Double click on the "HomeController.cs" file and you will see the following code using System; using System.Collections.Generic; using System.Linq; using System.Threading.Tasks; using Microsoft.AspNetCore.Mvc; namespace NorthwindCafe.Web.Controllers { public class HomeController : Controller { // GET: / / public IActionResult Ind...

Enable MVC On ASP.NET Core Application

Image
In this post we will go over the process of enabling ASP.NET MVC in our application.  Just like static files, in order for us to use MVC in our application we have to tell ASP.NET Core to use in the Startup.cs file.  We will continue to use the application "NorthwindCafe" that we used in our previous blog. Here are the steps to add MVC to your application: 1.  Open the Startup.cs file, then in "ConfigureServices" method type in the following to enable MVC public void ConfigureServices(IServiceCollection services) { services.AddMvc(); } 2. As with the static files, there will be a red underline on the .AddMvc() method that's because we haven't added the package to your project yet.  So click on the yellow light and select the first option to add Microsoft.AspNET.Mvc package to our project. 3.  Now go into the Configure method and type app.UseMvc() into the method, the final markup should look like the following publ...

Enable ASP.NET Core to Serve Static Files

Image
As I have mentioned before ASP.NET Core decouples the application from the infrastructure as much as possible.  Therefore, you have to tell it exactly what you want in your project.  In this blog post we are going to tell ASP.NET that we want to serve static html files in our application. Here are the steps to serve static files in our ASP.NET Core application. 1.  Open the "NorthwindCafe.Web" project, then click on the "Startup.cs" file in the project.  You will see the following markup in the Configure method public void Configure(IApplicationBuilder app) { app.Run(async (context) => { await context.Response.WriteAsync("Hello World!"); }); } 2.  Go into the Configure method, remove the existing code and type in the following code public void Configure(IApplicationBuilder app) { app.UseStaticFiles() } You will notice that the app.UseStaticFil...

How To Create An ASP.NET Core Application From Scratch

Image
Technology has moved at a breakneck speed, after working with ASP.NET Core for a while, I realized that my ASP.NET MVC blog articles have become outdated.  Don't get me wrong, MVC is still a very big part of ASP.NET Core, but that's the thing it's just a part of it.  ASP.NET Core has decoupled the infrastructure from the application.  You can deploy your web app on Docker imagine that!  No longer is IIS your primary means of hosting your ASP.NET application. However, with this new freedom comes added complexity.  No longer can you just drag and drop components into your design surface.  Those days are long gone.  This post ist meant to ease your way into ASP.NET Core.  I will using the release candidate version two of ASP.NET Core for this post and other subsequent posts.  Don't be surprise if I update the version midstream because the product is still pre-release.  I will be using Visual Studio 2015 for my development.  You can use...

ASP.NET MVC 5 From Scratch : Create an ASP.NET MVC 5 Empty Project

Image
A lot of people think that you can only create one kind of ASP.NET MVC 5 project, the one with the sample application.  But the reality is that you can create an Empty ASP.NET MVC 5, you just need to do more work.  However, it is cleaner and you can add what you need, instead of having everything in place already like the default template.  So you might run into more errors with the empty project, but I think you will learn more about MVC than if you just have the default template.  Plus it's more streamline.  I always start with an empty project on my MVC projects.  In order to follow this tutorial you must have Visual Studio 2013 installed. Step-By-Step Instructions: Create a new project in Visual Studio call "MvcApp", by clicking on File → New → Project Select Visual C# → Web → ASP.NET Web Application, in the "Name:" field type the name "MvcApp", then click "OK"    3.  On the next screen select "Empty" on the "Select a templ...

ASP.NET MVC 5 From Scratch : Add KnockoutJs to Project With NuGet

Image
In this blog we will add the KnockoutJs JavaScript library to our MvcApp project.  KnockoutJs is a great lightweight data binding library.  Follow the steps below to add KnockoutJs to your ASP.NET MVC project. Step-By-Step Instructions : 1.  Right-click on the project's "References" node, then select "Manage NuGet Packages" 2. In right hand side type in "knockoutjs", then click on the "Install" button next to the knockoutjs package   3.  You should see a green checkmark after you finished adding the knockoutjs library to the MvcApp project. 4. In the "Scripts" folder you will see the knockout JavaScript files 5.  Now that we have the knockoutjs files we need to add the files to the BundleConfig.cs file to register them 6.  Open the BundleConfig.cs file in the "App_Start" folder type the following lines of code inside the RegisterBundles method, this tells MVC to include any files in the "Scripts" folder that sta...

ASP.NET MVC 5 From Scratch : Create Entity Data Model With Entity Framework

Image
In our previous blogs we've created an ASP.NET MVC from scratch.  In this blog we are going to use Entity Framework as the ORM (Object Relational Mapping) as a conduit to our database, so that we can query our data as an object.  An ORM as the name implies maps database tables, views, and stored procedures as objects in a programming language so that developers can work with the data as objects. Step-by-Step Instructions: 1.  First we need to add the Entity Framework 6.1.3 to our ASP.NET MVC, we accomplish by right-click on "References" then select "Manage NuGet Packages" 2. On the search box type in "EntityFramework" no spaces, in the search result click on the "Install" button next to the "EntityFramework" package. 3.  Click "I Accept" on the "Licence Acceptance" screen 4. Click "Close" 5.  Once the "EntityFramework" package has been added you will see a green checkmark next to the "E...

ASP.NET MVC 5 From Scratch : Adding BundleConfig

Image
In our previous blog we've added a _ViewStart.cshtml layout to our project, which is the default layout for our pages if no layout is specified for the page.  In this blog we will add BundleConfig for the JavaScript libraries which includes JQuery , and Bootstrap that we've added to our MvcApp project in the previous blogs.  A configuration bundle allows you to group files that belongs in the same libraries together so that they can called with just one line of code.  In this blog we will be creating configuration bundles for JQuery, and Bootstrap to the MvcApp project. Step-By-Step Instructions : 1.  Right-click on the folder "App_Start", then select Add → New Item → Visual C# → Class, name the class BundleConfig.cs 2.  Now the App_Start folder should look like the screenshot below 3.  Open the BundleConfig.cs file, then delete the existing using statements, and then add the following namespaces using System.Web; using System.Web.Optimization; 4. The resu...