JQuery Basics: Selectors
Selectors are at the heart of JQuery in almost every task you want to perform in JQuery, your initial setup is to use a selector to select an element in the DOM to perform some action on it. So in this blog we will show you some the common selectors that you will have to use in JQuery to get the job done.
First let's make sure JQuery is working by creating an HTML file with a little JQuery test script in it:
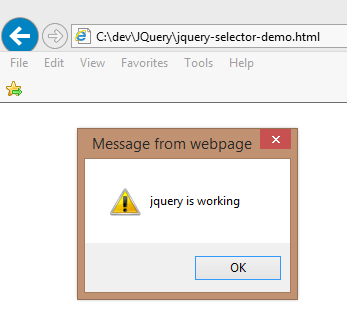
When you run the page with the code in your browser you should see the following:
Now that we know that JQuery is working change the html markup to the following:
The code above just sets up the elements that we will be selecting later on in this blog. The first <div> element has an id attribute with the value "my-div-id". An id in an html element stores the unique identifier for that element. The second div element has the class attribute with the value "my-div-class" a class attribute refers to a CSS style class defined with . in front of the name. The third <div> element is just your plain old div tag.
Now we will use JQuery to manipulate these three <div> tags:
First let's do a before snapshot of how the html markup looks like in the browser using FireFox's plugin FireBug, here is how our html looks like before we do anything
Now let's select the div tag with the id "my-div-id" with the following command:
If we look at the markup in FireBug now we will see that div with the id "my-div-id" has been manipulated and the text "selected my-div-id" has been added to the div.
The code above select the id by using the # symbol which tells JQuery to select the object that matches the value that preceeds it. Therefore, #my-div-id selects the element with the id my-div-id. If we want to be more specific we can specify that we only want to select the div tag with the id my-div-id with the following code div#my-div-id. So the following code does the same thing.
Now let's select the div with the class "my-div-class" with the following code.
If we look at the browser with FireBug again we will see that the div with the class "my-div-class" now has the text "selected my-div-class".
The same principle applies for selecting CSS classes, but instead of the # symbol we use the dot . symbol instead to tell JQuery to select only the CSS class that matches the selection value of "my-div-class".
Now how would you select all of the div tags on the page?
Well if we don't specify whether we want to select an id # or a class . then we would end up selecting just the div elements. If we write something like the code below we will select all of the div tags.
Note: The simple and single selectors performs better than nested and complicated selectors, for example $('#my-div-id') performs better than $('div#my-div-id'), since the id will be unique anyway, it's probably safe in most situations to just use the id as the selector value. Also if you want to select or than one element at the same time you can separate the selectors with a comma. For example the following selects both the div id and the div class
First let's make sure JQuery is working by creating an HTML file with a little JQuery test script in it:
<html lang="en">
    <head>
        <meta charset="utf-8" />
        <title>JQuery Selector Demo</title>
  <script src="http://ajax.googleapis.com/ajax/libs/jquery/1.11.2/jquery.min.js"></script>
  <script>
   $(document).ready(alert("jquery is working"));
  </script>
    </head>
    <body>
    </body>
 </html>
When you run the page with the code in your browser you should see the following:
Now that we know that JQuery is working change the html markup to the following:
<html lang="en">
    <head>
        <meta charset="utf-8" />
        <title>JQuery Selector Demo</title>
  <script src="http://ajax.googleapis.com/ajax/libs/jquery/1.11.2/jquery.min.js"></script>
  <script>

  </script>
    </head>
    <body>
  <div id="my-div-id"></div>
  <div class="my-div-class"></div>
  <div></div>
    </body>
 </html>
The code above just sets up the elements that we will be selecting later on in this blog. The first <div> element has an id attribute with the value "my-div-id". An id in an html element stores the unique identifier for that element. The second div element has the class attribute with the value "my-div-class" a class attribute refers to a CSS style class defined with . in front of the name. The third <div> element is just your plain old div tag.
Now we will use JQuery to manipulate these three <div> tags:
First let's do a before snapshot of how the html markup looks like in the browser using FireFox's plugin FireBug, here is how our html looks like before we do anything
Now let's select the div tag with the id "my-div-id" with the following command:
  <script>
 $(document).ready(function() {
  $('#my-div-id').text("selected my-div-id");
 });

  </script>
If we look at the markup in FireBug now we will see that div with the id "my-div-id" has been manipulated and the text "selected my-div-id" has been added to the div.
The code above select the id by using the # symbol which tells JQuery to select the object that matches the value that preceeds it. Therefore, #my-div-id selects the element with the id my-div-id. If we want to be more specific we can specify that we only want to select the div tag with the id my-div-id with the following code div#my-div-id. So the following code does the same thing.
Now let's select the div with the class "my-div-class" with the following code.
 $(document).ready(function() {
  $('div.my-div-class').text("selected my-div-class");
 });
If we look at the browser with FireBug again we will see that the div with the class "my-div-class" now has the text "selected my-div-class".
The same principle applies for selecting CSS classes, but instead of the # symbol we use the dot . symbol instead to tell JQuery to select only the CSS class that matches the selection value of "my-div-class".
Now how would you select all of the div tags on the page?
Well if we don't specify whether we want to select an id # or a class . then we would end up selecting just the div elements. If we write something like the code below we will select all of the div tags.
  <script>
 $(document).ready(function() {
  $('div').text("selected div");
 });

  </script>
Note: The simple and single selectors performs better than nested and complicated selectors, for example $('#my-div-id') performs better than $('div#my-div-id'), since the id will be unique anyway, it's probably safe in most situations to just use the id as the selector value. Also if you want to select or than one element at the same time you can separate the selectors with a comma. For example the following selects both the div id and the div class
$('div.my-div-class,#my-div-id');


Comments
Post a Comment