Posts

JQuery : jQuery.noConflict(); Resolve the $ Conflict

Image
The JQuery library by design uses only two global namespace so that it would not conflict with other JavaScript libraries. $ - the dollar is used as a reference to JQuery namespace Also used by Prototype library, YUI and mootools jQuery - is also used to reference to jQuery namespace, this the more unique reference of the two options, but nobody really uses it So what do you do if you wanted to use jQuey and Prototype on the same page?  Well jQuery can concede the $ sign to the other libraries with the code jQuery.noConflict() function This sample code shows how jQuery gives up the $ sign to the JavaScript library Prototype <!DOCTYPE html> <head> <meta charset="UTF-8"> <title>JQuery No Conflict</title> <script src="http://ajax.googleapis.com/ajax/libs/prototype/1.7.2.0/prototype.js"></script> <script src="http://ajax.googleapis.com/ajax/libs/jquery/1.11.1/jquery.min.js"></script> <script type="t...
Installing The Northwind Sample Database From Microsoft

Image
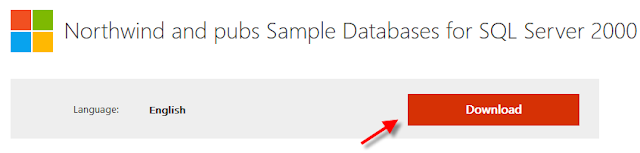
The Northwind sample database is probably the most mention sample database of all time.  Most of the tutorials on the web uses the Northwind sample database as an example.  However, it's not as straight forward to add the Northwind database to your SQL Server instance as you may have think.  The reason is because the Northwind database was initially created for SQL Server 2000.  Therefore, most of the newer versions of SQL Server will throw an error when you tried to attach the .mdb file.  It is easier to run the SQL script that is provided with the download.  In this blog we will go over where to download the Northwind sample database, and how to add to your SQL Server instance using the SQL script. 1. Open your browser and type in the following URL in the address bar https://www.microsoft.com/en-us/download/details.aspx?id=23654 2.  Click on the "Download" button 3.  Save the SQL2000SampleDb.msi file to a location that you will remember in your ...

Blogger: Adding Adsense Ads To Blogger

Image
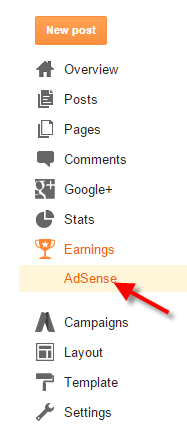
Let's face it, most of us starts blogging so that we can can hopefully retire in the Caribbean using money that we make from our blog.  Well to do that we need ads on our blog.  In this blog post we will go over the steps to associate, and setup Adsense ads on your Blogger blog. Step-By-Step Instructions: 1. Log into your Blogger Blog account, then click on Earnings → AdSense 2.  Click "Sign up for AdSense" 3.  A warning message will appear, saying you are signed as your Blogger Google account.  If your AdSense account is different than your Blogger account then click on "Use a different or new Google Account", else click on the "Yes, use ......." button if your Blogger account and AdSense account are the same. 4.  Click on "Yes, proceed to Google Account sign in" to sign into your Adsense account. 5.  Sign into your AdSense account 6. After signing in you will be taken to "Step 2: Tell us about your content" screen.  Click the ...

Blogger : Import Blog Posts From Another Blogger Blog

Image
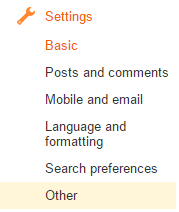
In the previous blog we've exported a blog from Blogger.  In this blog we will import the .xml file that we've exported from that blog . Step By Step Instructions: 1.  Sign into the blog the you want to import your blog posts to 2. Under the "Settings" section click on the "Other" 3.  Click on the "Import blog" link 4. Click on the "Choose File" button 5.  Select the .xml export file 6.  Check the "I'm not a robot" checkbox, then click "Import Blog" button. 7.  The blogs from another blog will show up on the designated blog You can view the imported blog posts at http://techjunkiesandbox.blogspot.com

Blogger : Export Blog Posts From Blogger Blog

Image
In this blog we will go over how to export your blogs in Google's Blogger blogging application. Step-By-Step Instructions Exporting Your Blog : 1. Sign into the blog you want to export your blog posts from. 2.  Select "Other" in the "Settings" section 3.  In the "Blog Tools" section select "Export blog" 4.  In the pop up dialog box click on the "Download Blog" button 5. Save the .xml file that Blogger generates, by clicking on the "Save" button. 6.  Your blog has now been exported to an xml file 7.  Click "Close" on the "Export Blog" pop up window

Blogger: Create A New Blog In Blogger

Image
Creating a new blog in Blogger is really easy in fact it takes less than five minutes to do.  Well maybe ten minutes if you have to take screen shots.  Below is a step by step process of how to create your new Blogger blog. Step-By-Step: 1.  Log into blogger.com with your Google account, you will be logged into the Blogger dashboard 2.  In the dashboard there will be button that says "New Blog", click on the button 3.  The "Create  a new blog" window will appear, type in the "Title" and the "Address" for your blog as you type the address blogger will show you what the final URL will look like. 4.  Choose a template for your blog, and then click on the "Create blog!" button. 5.  Your new blog will be created in your dashboard. 6.  Type in the browser URL bar your new blog's URL in this case it's techjunkiesandbox.blogspot.com You can visit the finish new blog at techjunkiesandbox.blogspot.com

JQuery: Search Context Parameter (Select Within A Container)

Image
There's actually two selector parameters in JQuery.  The second parameter is the context parameter.  The context parameter specify the context that the selector should operate within that context.  Let's use the bootstrap form field markup below as an example: <!DOCTYPE html> <html lang="en"> <head> <meta charset="utf-8" /> <script src="http://code.jquery.com/jquery-1.11.2.min.js"></script> <script src="https://maxcdn.bootstrapcdn.com/bootstrap/3.3.2/js/bootstrap.min.js"></script> <!-- Latest compiled and minified CSS --> <link rel="stylesheet" href="https://maxcdn.bootstrapcdn.com/bootstrap/3.3.2/css/bootstrap.min.css"> <!-- Optional theme --> <link rel="stylesheet" href="https://maxcdn.bootstrapcdn.com/bootstrap/3.3.2/css/bootstrap-theme.min.css"> <title></title> <style> .form-label-s...